A puncture is one of the most common mechanical problems cyclists face. Whether you’re commuting, training, riding a sportive, or racing, sooner or later you’ll hear the unmistakable hiss of escaping air or feel your bike becoming increasingly difficult to control. The good news is that fixing a puncture is a straightforward skill that every cyclist should learn. With a little practice and a few basic tools, most punctures can be repaired in less than 15 minutes, allowing you to get back on the road quickly and confidently. Knowing how to fix a puncture is also an important part of becoming a more self-sufficient cyclist.
Why Punctures Happen?
Road bike punctures can occur for several reasons, including:
- Sharp debris
- Glass fragments
- Thorns
- Pinch flats
- Worn tires
- Poor tire pressure
Cyclists who understand common gear mistakes every cyclist should avoid know that equipment maintenance often plays a major role in preventing roadside problems.
What You’ll Need?
Before heading out, carry:
- Spare inner tube
- Tire levers
- Mini pump or CO₂ inflator
- Patch kit (optional)
- Multi-tool
Being prepared can turn a frustrating situation into a minor inconvenience.
Move to a Safe Location
If you puncture during a ride:
- Pull off the road safely
- Move away from traffic
- Find stable ground
Safety should always come before repairs.
Identify Which Tire Is Flat
Check whether the puncture is in:
- Front wheel
- Rear wheel
The repair process is largely the same, although removing the rear wheel usually requires a few additional steps because of the drivetrain.
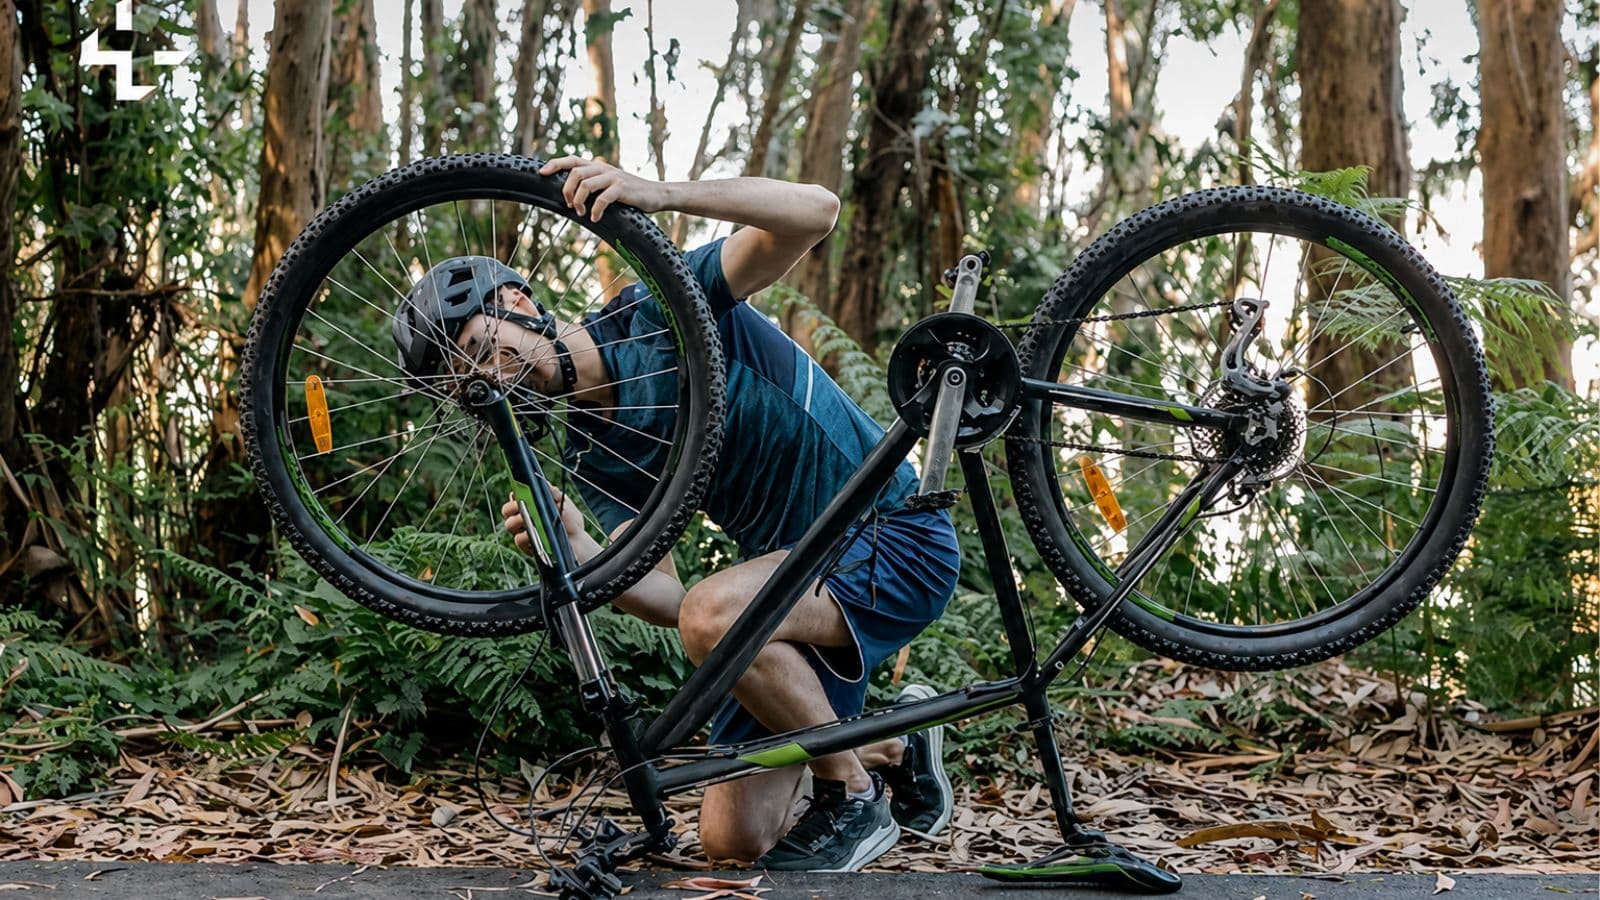
Remove the Wheel
For the front wheel:
- Open the quick release or thru-axle
- Remove the wheel
For the rear wheel:
- Shift into the smallest rear cog
- Release the wheel
- Carefully remove it from the frame
Cyclists who understand what cycling drills help improve bike technique know that becoming comfortable handling your bike makes roadside repairs much easier.
Deflate Any Remaining Air
If the tube still contains air:
- Press the valve
- Remove remaining pressure
A fully deflated tube is easier to remove from the tire.
Use Tire Levers Carefully
Insert a tire lever under the tire bead.
Then:
- Hook it onto a spoke if necessary
- Slide another lever around the rim
- Lift one side of the tire off the wheel
Take care not to damage the tube or tire.
Remove the Inner Tube
Pull the tube out completely. Leave one side of the tire mounted on the wheel. Before installing a new tube, find the cause of the puncture.
Inspect the Tire Thoroughly
This is a step many cyclists skip.
Carefully check for:
- Glass
- Thorns
- Metal fragments
- Sharp debris
Run your fingers carefully along the inside of the tire. If the object remains embedded, the replacement tube may puncture immediately. Cyclists who understand how to train smarter and ride stronger know that attention to detail often prevents repeat problems.
Check the Rim
Inspect the rim and rim tape for:
- Sharp edges
- Damage
- Exposed spoke holes
Occasionally the wheel itself contributes to punctures.
Install the New Tube
Add a small amount of air to the spare tube. This helps it hold shape and reduces the risk of pinching.
Then:
- Insert the valve
- Place the tube inside the tire
- Work evenly around the wheel
Avoid twisting the tube.
Refit the Tire
Starting opposite the valve:
- Push the tire bead back onto the rim
- Work around both sides
- Finish near the valve
Try to avoid using tire levers during installation if possible, as they can pinch the tube.
Check for Pinches
Before inflating:
- Inspect both sides of the tire
- Ensure no tube is trapped between tire and rim
This quick check can prevent immediate punctures.
Inflate the Tire
Use:
- Mini pump
- Floor pump
- CO₂ inflator
Inflate to an appropriate pressure for:
- Rider weight
- Tire width
- Road conditions
Cyclists who understand cyclist’s knee and its causes know that proper tire pressure affects both comfort and performance.
Reinstall the Wheel
Secure the wheel correctly:
- Tighten quick release or thru-axle
- Confirm alignment
- Check brake clearance
Spin the wheel to ensure it rotates freely.
Test Before Riding Away
Before continuing:
- Squeeze the tire
- Check wheel security
- Confirm brakes function properly
A quick inspection can prevent additional problems later.
Should You Patch or Replace?
On the roadside, replacing the tube is usually faster.
Patching is useful when:
- You run out of spare tubes
- You want to repair the damaged tube later
Many experienced cyclists replace first and patch at home.
Preventing Future Punctures
While punctures cannot be eliminated completely, you can reduce the risk by:
- Checking tire pressure regularly
- Replacing worn tires
- Inspecting tires after rides
- Avoiding road debris
- Carrying repair supplies
Cyclists who understand how can heart rate zones improve cycling speed and fitness know that consistency is easier when mechanical interruptions are minimized.
Learn at Home First
The worst time to learn puncture repair is during a ride.
Practice:
- Wheel removal
- Tire removal
- Tube replacement
at home before you need the skill in real-world conditions.
Tubeless Tires Are Different
Many modern road bikes use tubeless systems.
While small punctures often seal automatically, larger punctures may require:
- Tire plugs
- Emergency tubes
- Additional repair tools
Cyclists should understand the specific repair procedures for their setup.
Why Every Cyclist Should Know This Skill?
Being able to fix a puncture:
- Increases confidence
- Improves independence
- Reduces ride disruptions
- Makes longer rides less stressful
Cyclists who understand why is consistency more important than intensity for cycling success know that avoiding missed training sessions can have a surprisingly large impact over time.
Common Puncture Repair Mistakes
Many cyclists:
- Forget to remove the cause of the puncture
- Pinch the replacement tube
- Fail to check tire pressure
- Install tubes incorrectly
- Rush the repair
- Carry no spare tube
- Ignore worn tires
- Forget to practice beforehand
Most of these mistakes are easy to avoid.
How to Fix a Road Bike Puncture Successfully?
The basic process is:
- Move to a safe location
- Remove the wheel
- Remove the damaged tube
- Find and remove the cause
- Install a new tube
- Refit the tire
- Inflate properly
- Reinstall the wheel and continue riding
Like many cycling skills, puncture repair becomes much easier with practice. Once mastered, it’s a simple roadside task that can keep your ride going with minimal interruption.
FAQs
Glass, thorns, debris, pinch flats, and worn tires are common causes.
Replacing is usually faster during a ride. Patching can be done later.
Many cyclists carry at least one, while longer rides may justify carrying two.
Sometimes, but tire levers make the process much easier.
Carefully inspect the tire and run your fingers along the inside.
You may have missed the object that caused the original puncture.
Yes. Tubeless systems often use sealant and may require plugs.
With practice, many cyclists can replace a tube in under 10 minutes.